
I’ll be honest with you. Last Halloween, my decorations were… well, let’s just say they were forgettable. A few plastic pumpkins, some fake cobwebs, and maybe a skeleton or two if I felt ambitious. But this year? This year I decided to step up my game after seeing my neighbor’s absolutely insane window projection display. That’s when I discovered the world of Halloween projectors, and trust me, it’s been a complete game-changer.
After weeks of research, testing, and probably spending way too much time on Reddit forums at 2 AM, I finally found what I believe is the best Halloween projector for most people. And no, it’s not some crazy expensive piece of equipment that requires a degree in film production to operate.
What Is a Halloween Projector (And Why You Actually Need One)
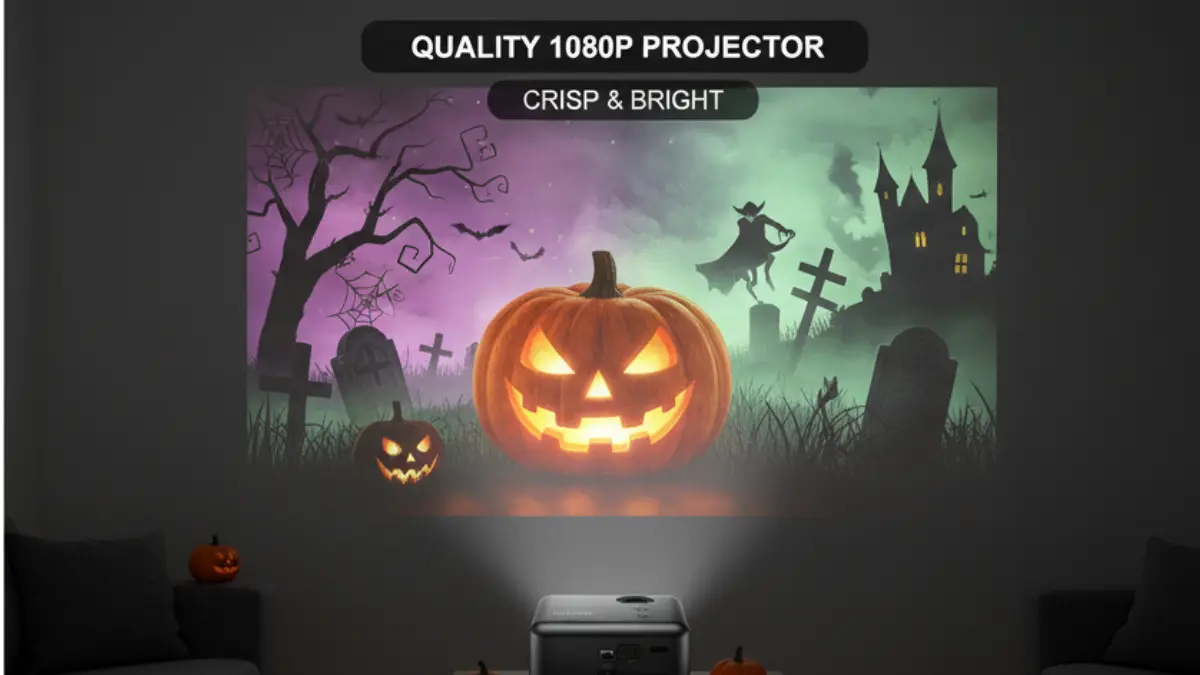
Before I dive into my personal experience, let me explain what these magical devices actually do. A Halloween projector is basically a portable video projector that you can use to display spooky animations, ghostly figures, and creepy effects on your windows, walls, garage doors, or even props like pumpkins.
Unlike those cheap laser light projectors that just throw static images around (you know the ones), a real Halloween projector plays actual video content. We’re talking full-motion ghosts floating through your windows, witches stirring cauldrons, singing jack-o’-lanterns, and skeleton pirates having entire conversations. It’s like having a mini haunted house without the hassle of storing tons of decorations for 11 months of the year.
The best part? Most of these projectors aren’t just one-trick ponies. You can use them for Christmas projections, backyard movie nights, gaming sessions, and basically any time you need a screen but don’t want to mount a permanent TV.
Why I Bought My First Halloween Projector
So here’s the story. Last September, I was walking my dog around the neighborhood when I spotted this house that looked legitimately haunted. There were these incredibly realistic ghosts floating in the windows, complete with eerie sound effects that made my hair stand on end. For a second, I genuinely thought they had hired actors to stand in their windows all evening (which would be weird, right?).
Turns out, it was all done with a simple projector and something called AtmosFX digital decorations. I stood there like a kid at a magic show, trying to figure out how they did it. When the homeowner came out, I practically bombarded him with questions. He was super cool about it and explained the whole setup, which honestly sounded way easier than I expected.
That night, I went down a rabbit hole of YouTube videos, Reddit threads, and Amazon reviews. I was determined to create my own spooky display, but I didn’t want to spend a fortune or deal with complicated equipment. I’m decent with tech, but I’m no professional videographer.
My Personal Experience: What I Actually Bought and How It Worked Out
After comparing what felt like a hundred different options, I landed on a Smart 1080p Portable Mini Projector with some pretty sweet features. At $249, it wasn’t the cheapest option, but it definitely wasn’t breaking the bank either. Here’s what sold me on this particular model:
The specs that mattered to me:
- Native 1080p resolution (1920×1080) – because I wanted crisp, clear ghosts, not pixelated blobs
- Built-in Android 13 with WiFi 6 – I could stream content directly without needing a laptop
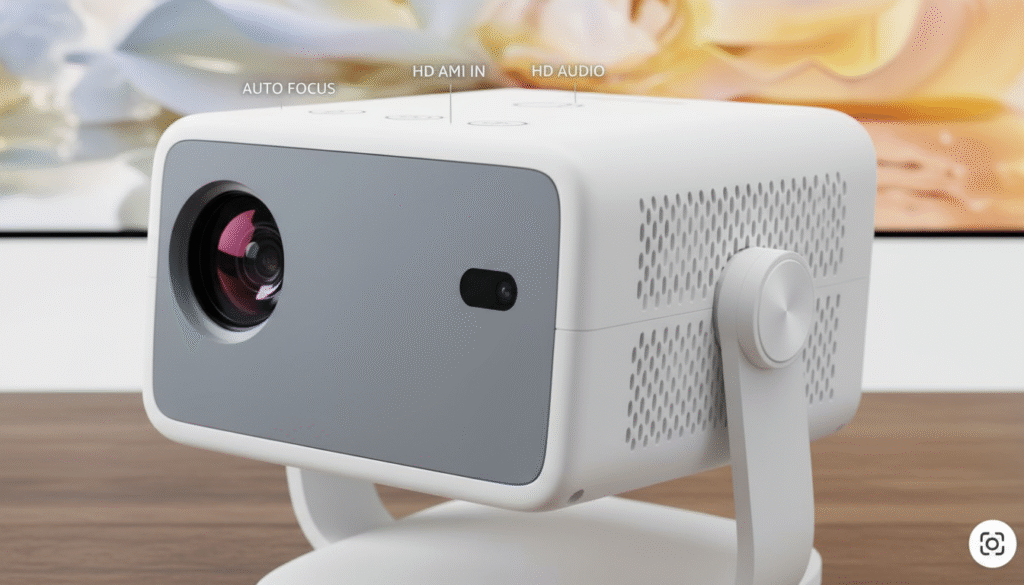
- Auto-focus technology – because manually adjusting focus while standing on a ladder? No thanks
- Built-in speakers – decent enough for sound effects without rigging up external audio
- Actually portable – lightweight enough to move from window to window
When the package arrived, I’ll admit I was nervous. What if it was too dim? What if the image looked terrible? What if I couldn’t figure out how to work it?
Setting Up My Halloween Window Display (It Was Easier Than Expected)
Here’s where I was genuinely surprised. The setup took me maybe 30 minutes, and that’s including the time I spent untangling the power cord and finding the perfect spot for the projector.
My setup process:
First, I grabbed a white shower curtain from Target for like $8. Some people get fancy with special projection screens, but honestly, the shower curtain worked perfectly for my window display. I used some painter’s tape to hang it on the inside of my front window – stretched it pretty tight to avoid wrinkles that could distort the image.
Then I placed the projector about 8 feet back from the window, positioned on a small table. The auto-focus feature was clutch here because it automatically adjusted to get a sharp image. I didn’t have to fiddle with manual focus rings or anything complicated.
Next, I downloaded a few Halloween animations. I went with AtmosFX’s “Phantom of the Park” and “Witch in the Window” effects – these are basically the gold standard for Halloween projections. They offer super high-quality animations that look legitimately spooky. Cost me about $15-20 per animation, but they’re reusable every year.
I loaded the videos onto a USB drive, plugged it into the projector, and hit play. That’s it. Seriously, that was the whole process.
The Moment of Truth: Did It Actually Look Good?
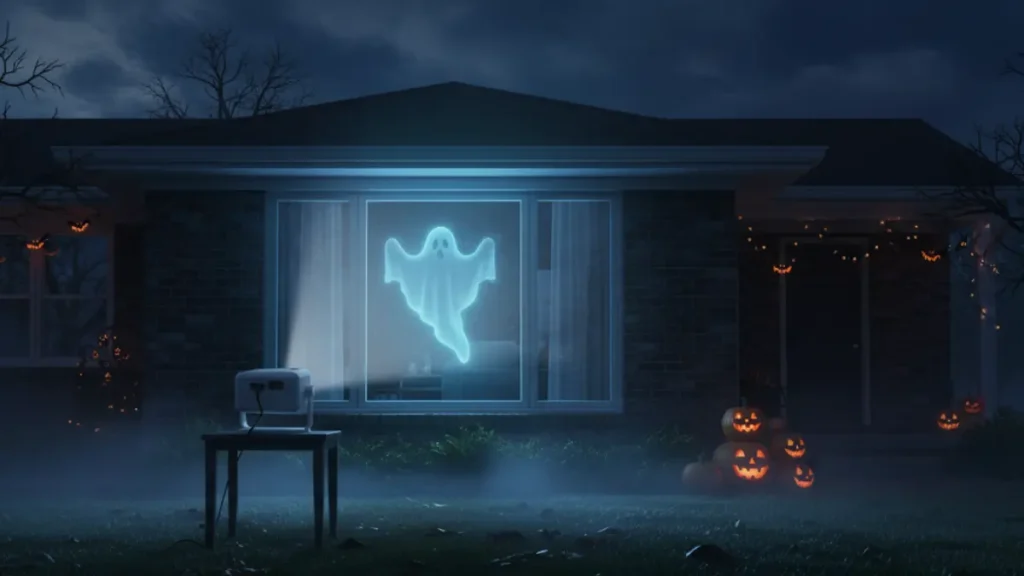
When dusk started falling and I turned on the projector for the first time, I actually said “holy crap” out loud. The ghost figure appeared in my window looking so realistic that even I did a double-take, and I was the one who set it up.
The 1080p resolution made a huge difference compared to the cheaper projectors I’d seen in videos. Every detail was crisp – you could see the texture of the ghost’s tattered clothes, the glow effect around the figure, even subtle facial movements. The colors were vibrant, and the contrast between the dark areas and the illuminated parts created this genuinely eerie atmosphere.
The built-in speaker wasn’t going to win any audiophile awards, but for my purposes, it worked great. The ghostly moans and creepy sound effects were plenty loud enough to be heard from the sidewalk. If I were doing a huge display with lots of foot traffic, I might add external speakers, but for a residential neighborhood setup, it was perfect.
What Worked Really Well (The Good Stuff)
Let me break down what I loved about this whole experience:
The Picture Quality: The 1080p native resolution is no joke. I’ve seen friends use those budget projectors claiming “supports 1080p” (which usually means they’re actually 480p or 720p native), and the difference is night and day. My projections looked professional-grade, not like a blurry mess.
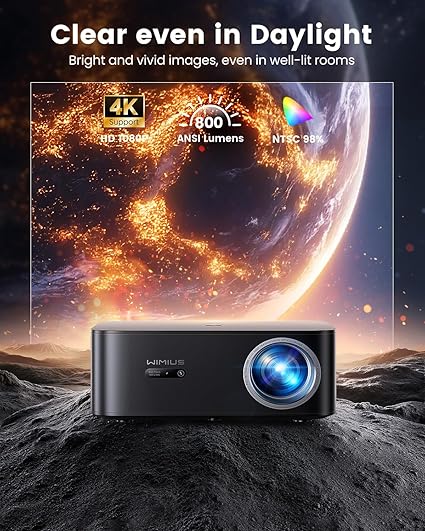
The Brightness: This is crucial for Halloween projections. My projector puts out enough lumens (brightness) that even with some ambient street lighting, the image stayed visible and vibrant. I didn’t need a pitch-black environment to see the effects clearly.
Auto-Focus is a Game Changer: I cannot stress enough how convenient this feature is. Every time I moved the projector slightly or adjusted the angle, it automatically refocused within seconds. No squinting at the screen trying to manually dial in the perfect focus.
The Built-in Android System: Being able to access YouTube, download apps, or stream content directly from the projector without connecting external devices was incredibly convenient. I could switch between my Halloween videos and a spooky playlist on Spotify without touching my phone.
Portability: At first, I wasn’t sure how much I’d value this, but it turned out to be huge. Halloween night, I moved the projector from my front window to the garage door, then later to the backyard for an outdoor movie screening of Hocus Pocus for the neighborhood kids. The whole thing weighs maybe 5 pounds and fits in a small bag.
What Could Have Been Better (The Real Talk)
Okay, time for some honesty because no product is perfect, right?
The Built-in Speaker is Just “Good Enough”: While it worked fine for my setup, if you’re creating a professional-grade haunted house display or hosting a big Halloween party, you’ll probably want to connect external speakers. The sound is decent, but it’s not going to rattle windows or create that deep, booming horror movie effect.
You Need the Right Content: This projector is amazing, but it’s only as good as what you’re projecting. The cheap or free Halloween animations you find on random YouTube channels often look pretty cheesy. Investing in quality content from AtmosFX or similar professional sources makes a massive difference. That’s an additional cost to factor in.
Setup Location Matters More Than I Thought: You need enough distance between the projector and your projection surface to get a good-sized image. My window needed about 8-10 feet of clearance inside the room. If you have a small space or lots of furniture in the way, positioning can get tricky.
It’s Not Weatherproof: This should be obvious, but it’s worth mentioning – this is an indoor projector. If you want to use it outside, you need to protect it from rain, moisture, and extreme temperatures. I built a simple rain shield out of a plastic storage container for outdoor use, which worked fine.
Battery Life… Wait, There’s No Battery: This is a corded projector, meaning you need to be near a power outlet. Some portable projectors have built-in batteries, but this one doesn’t. For my uses that was fine, but if you’re planning some off-grid outdoor setup, you’ll need a power source or a portable battery pack.
Features That Actually Matter for Halloween Displays
After using this projector for the entire Halloween season (and honestly, I’ve kept using it for movie nights since), here’s what I learned about which features actually matter versus which ones are just marketing fluff:
Resolution: Native 1080p is the Sweet Spot
Don’t be fooled by projectors that say “supports 4K” but have a native resolution of 480p or 720p. For Halloween projections, you want at least native 1080p to get crisp, detailed images that look professional. Anything less and your ghosts start looking like pixelated blobs from a 1990s video game.
Brightness (Lumens): Aim for 3000+ for Best Results
Here’s where I learned a tough lesson. Lumens measure brightness, and for Halloween displays with some ambient light, you need enough punch to make the image visible. My projector handles evening and nighttime displays beautifully, but if you’re in a well-lit area or want to start projecting before full darkness, higher lumens are better. For outdoor displays in areas with street lights, aim for 3000 lumens or more.
Auto-Focus vs Manual: Auto Wins Every Time
I thought this would be a “nice to have” feature, but it became essential. Every time I repositioned the projector or changed the projection distance, the auto-focus adjusted instantly. My friend tried setting up a similar display with a manual focus projector, and he spent 20 minutes trying to get it sharp. His language got pretty colorful by the end.
Built-in Media Player: Absolutely Worth It
Being able to play content directly from a USB drive or stream from built-in apps eliminates so many headaches. No need to connect a laptop, DVD player, or other devices. Just load your Halloween videos on a USB stick, plug it in, and you’re done.
Keystone Correction: More Important Than You Think
This feature lets you adjust the image shape when the projector isn’t perfectly aligned with your screen. Unless you have the luxury of mounting your projector at the exact right height and angle (I didn’t), keystone correction saves you from having a weirdly distorted trapezoidal image.
Comparing to Other Popular Options I Considered
Before settling on my choice, I seriously looked at several other popular Halloween projectors. Here’s how they stacked up:
AAXA HP3/HP4 Halloween Projectors ($200-300)
These are basically the “official” Halloween projectors, coming pre-loaded with AtmosFX effects. The HP4 is actually pretty solid with 1080p support and 8 pre-loaded effects. The main advantage is it’s truly plug-and-play – turn it on and you’ve got instant Halloween content.
The downside? You’re limited to the included effects unless you buy more separately. My projector’s flexibility to play any content I wanted felt more versatile. Plus, after Halloween, the AAXA models are still useful for regular projection, but they’re really optimized for holiday displays.
ViewSonic M1/M2e Smart Portable Projectors ($400-600)
These are gorgeous, highly-rated projectors with excellent build quality. The M2e has 1000 LED lumens and fantastic Harman Kardon speakers. If you’ve got the budget and want top-tier quality for both Halloween and year-round use, these are hard to beat.
But here’s the thing – they cost significantly more than my choice. For my first Halloween projector setup, I wasn’t ready to drop $500+. If I were planning to use it constantly for backyard movie nights, presentations, and gaming, the extra investment might make sense.
Budget Options Under $150
I’ll be real with you – I looked at tons of cheaper projectors on Amazon claiming incredible specs for under $100-150. The reviews were all over the place, and almost every comparison video showed these budget units having dim, washed-out images with terrible color accuracy.
After talking to people who actually used them, the consensus was clear: they work okay for Halloween projections if you have a perfectly dark environment, but the moment there’s any ambient light, you’re toast. For the sake of an extra $100, getting a quality unit felt worth it to me.
Professional AtmosFX Kits with Projector ($250+)
AtmosFX sells complete kits with their projector, projection screen, and pre-loaded effects. These are excellent all-in-one solutions if you want zero guesswork. The quality is there, and you’re getting everything you need in one package.
The trade-off is flexibility. You’re locked into their ecosystem, which is admittedly very good, but I liked having a projector I could use for anything beyond just Halloween and Christmas projections.
Who Should Buy This Projector
After my experience, I think this type of projector is perfect for:
First-Time Halloween Projection Enthusiasts: If you’re new to this whole projection decoration thing and want something that works without a steep learning curve, a mid-range portable projector like mine hits the sweet spot. It’s affordable enough that you won’t panic if it doesn’t work out, but quality enough to deliver professional-looking results.
People Who Want Year-Round Value: Look, $249 might seem like a lot for Halloween decorations that you only use one month a year. But if you can also use it for Christmas projections, backyard movies, gaming sessions, or even work presentations, suddenly it’s a pretty solid investment.
Homeowners with Space for Setup: You need a room or area where you can place the projector 8-12 feet from your window or wall. If you’re in a tiny apartment or don’t have that kind of clearance, you might need a short-throw projector (which typically costs more).
DIY Decorators Who Like Flexibility: If you’re the type who enjoys customizing your display, downloading different animations, and creating unique combinations of effects, having a versatile projector that can play any content is ideal.
Neighborhoods That Go All-Out for Halloween: If you live in an area where Halloween is a big deal and trick-or-treaters actually show up, a window projection instantly makes your house one of the memorable stops. Kids and parents alike were stopping to take videos of my display.
Who Should Maybe Look at Other Options
This projector probably isn’t the best fit if:
You Want the Absolute Easiest Setup: If you genuinely want to remove all thinking and just want instant Halloween effects, the AAXA projectors with pre-loaded content might be better. Plug in, turn on, done. My setup required downloading content and loading it onto a USB drive – not hard, but an extra step.
You’re on a Super Tight Budget: If $249 feels like too much, there are cheaper options, though they come with compromises in brightness and image quality. You might be able to find a used office projector on Facebook Marketplace for under $100 that could work for basic displays.
You Need Professional-Grade Brightness: If you’re doing a massive outdoor display with lots of ambient light or projecting onto your entire house exterior, you probably need a commercial-grade projector with 5000+ lumens. Those typically start around $800-1000+.
Best Projector for Halloween Effects
When it comes to choosing the absolute best projector for Halloween effects, here’s what I learned: it’s not just about the projector itself, but about matching the right tool to your specific needs.
For window projections (the most popular Halloween use), you want a projector with:
- At least 1080p native resolution for clear, detailed animations
- 2000-3000+ lumens for visibility in typical residential lighting
- A media player that can run content from USB drives or SD cards
- Enough throw distance to fill your window from inside the room
The smart portable projector I chose checks all these boxes while staying under $300. It’s bright enough that the projections look vivid even with some street lighting, sharp enough that details don’t get lost, and flexible enough to use for multiple windows or different setups throughout the night.
Best Projector for Halloween Window Displays
For specifically window displays (which is what most people want), there are some extra considerations:
Rear Projection Setup: This is where you project from inside your house onto a screen in the window, visible from outside. It’s the most popular method because the projector stays protected inside, and you can control everything from the comfort of your home.
The key is having the right screen material. I used a simple white shower curtain, which worked great. Some people prefer gray chiffon fabric or professional projection screens from AtmosFX. The goal is a material that lets light through while maintaining image quality.
Distance and Image Size: For a standard window (say, 4-6 feet wide), you typically need to place your projector 8-12 feet back inside the room. My projector’s throw ratio worked perfectly for this, filling a 6-foot window from about 10 feet away.
Angle and Placement: This is where keystone correction becomes crucial. Unless your projector is at the exact same height as the center of your window, you’ll need to adjust the image shape. My projector’s automatic keystone correction saved me so much hassle here.
Best Halloween Projector Videos and Content
Here’s something I didn’t fully appreciate until I started: the content you project matters just as much as the projector you use. You can have the best projector in the world, but if you’re playing low-quality, poorly-made animations, your display will look cheap.
Premium Options (Best Quality):
- AtmosFX Digital Decorations ($15-30 per effect): This is the industry standard. Their animations are professionally created, incredibly detailed, and specifically designed for projection. Effects like “Bone Chillers: Pirates,” “Ghostly Apparitions,” and “Witch in the Window” are absolutely worth the money.
- Window FX: Another professional option with high-quality animations, though I found their selection slightly smaller than AtmosFX.
Budget-Friendly Options:
- Free YouTube Content: There are tons of free Halloween projection videos on YouTube. Quality varies wildly, but some creators make surprisingly good content. Search for “Halloween window projection 4K” and you’ll find options.
- Etsy Sellers: Some independent creators sell Halloween projection videos for $5-15. I found a few gems here, though again, quality varies.
What I Actually Used:
I bought AtmosFX’s “Phantom of the Park” and “Witch in the Window” effects for about $40 total. They looked absolutely professional, and the animations are long enough (3-8 minutes) that they don’t get repetitive. I also grabbed some free singing pumpkin videos from YouTube for projecting onto actual pumpkins on my porch.
My recommendation: invest in at least one or two professional-quality effects from AtmosFX for your main display, then supplement with free content if you want variety.
Best Halloween and Christmas Projector
One of the smartest things I did was thinking about year-round use before buying. My projector doesn’t just do Halloween – it’s equally awesome for Christmas.
In December, I plan to project falling snow effects, Santa and reindeer animations, and Christmas carol performances onto my windows. The same projector, same setup, just different content. Some projectors (like certain AAXA models) even come with both Halloween and Christmas effects pre-loaded.
This versatility turns a $249 Halloween decoration into a multi-season investment. Add in the fact that I’ve already used it for three backyard movie nights since Halloween ended, and the cost-per-use keeps dropping.
If you’re looking for the best Halloween and Christmas projector combo, look for:
- Flexibility to play any video content (not locked to specific formats)
- Enough brightness for both outdoor and indoor use
- Decent built-in speakers or audio output options
- Easy repositioning between different windows or locations
Three Common Questions People Always Ask Me
Q: How many lumens do I need for a Halloween projector?
A: For indoor rear-window projections at night with typical street lighting, 1500-2500 lumens works well. For outdoor projections or areas with significant ambient light, aim for 3000+ lumens. More is generally better, though super bright projectors also cost more.
The projector I used falls in that sweet spot where it’s bright enough for residential use but not overkill. If you live on a well-lit street or start projecting before full darkness, consider going brighter.
Q: Can I use a regular projector for Halloween, or do I need a special “Halloween projector”?
A: Any projector can technically work for Halloween displays – there’s nothing magic about projectors marketed as “Halloween projectors.” The main difference is that dedicated Halloween projectors often come with pre-loaded effects and are optimized for easy seasonal decoration use.
A regular portable projector like mine works perfectly fine. You just need to source your Halloween content separately (which honestly gives you way more creative control).
Q: What’s the difference between a projector and those laser light Halloween decorations?
A: This confused me at first too. Those laser light projectors you see everywhere project static images or simple patterns – like snowflakes, bats, or pumpkins scattered across your house. They’re cheap ($20-50) and easy to use, but the effect is pretty basic.
A real video projector like what I’m talking about plays actual animated video content. Full-motion ghosts, talking skeletons, moving witches – it’s an entirely different level of sophistication and wow-factor.
My Final Verdict: Was It Worth It?
Okay, real talk time. Looking back at my first Halloween with a projector setup, would I do it again? Absolutely, without hesitation.
The projector I chose hit that perfect balance of quality, price, and usability. It wasn’t the cheapest option, but it also wasn’t breaking the bank. The image quality exceeded my expectations, the setup was way easier than I feared, and the reaction from trick-or-treaters and neighbors made every penny worth it.
Halloween night, I had kids literally standing on my lawn for 10 minutes watching the ghost animation loop. Parents were taking videos. Multiple neighbors asked me how I did it and where they could get one. My house went from forgettable to one of the neighborhood highlights.
But beyond Halloween, I’ve gotten so much additional use out of this thing. Movie nights in the backyard, projecting football games for tailgating, even using it for work presentations a couple times. That versatility transformed it from a seasonal decoration into a genuinely useful piece of tech.
What I’d do differently next time:
- I’d buy a better projection screen material instead of using a shower curtain (worked fine, but proper material would be an upgrade)
- I’d invest in a small external speaker for even better sound
- I’d buy more content variety – having 4-5 different animations to rotate through would keep things fresh
What I’d do exactly the same:
- Choose a projector with auto-focus (seriously, this is essential)
- Go for native 1080p resolution (worth every penny)
- Buy at least one premium AtmosFX animation (professional quality shows)
- Set up multiple projection spots throughout the evening
Where to Buy and What to Watch Out For
If you’re ready to take the plunge, here are my tips for buying:
Amazon is probably your best bet for most projectors. They have solid return policies if something doesn’t work out, and Prime shipping means you can get it quickly if Halloween is approaching.
Watch out for misleading specs: Many cheap projectors list “supports 1080p” or “8000 lumens” but those numbers are often wildly inflated or misleading. Look for “native resolution” and read reviews from verified purchasers who actually tested the device.
Check the return policy: Make sure you can return it if it doesn’t meet your needs. I was nervous enough about my purchase that knowing I could return it if necessary gave me peace of mind.
Buy content in advance: Don’t wait until Halloween night to realize you need to purchase animations. Get your content sorted at least a week ahead so you have time to test everything.
Ready to Transform Your Halloween?
If you’ve made it this far, you’re probably as excited about Halloween projections as I am now. The transformation from basic decorator to neighborhood Halloween legend is honestly just one projector away.
The smart portable projector I chose turned out to be one of my best purchases this year. At $249, it delivered professional-looking results without requiring professional-level knowledge or equipment. The native 1080p resolution, auto-focus, built-in Android system, and overall flexibility made the entire experience smooth and enjoyable.
Would I recommend this to friends? I already have – multiple times. Would I buy it again knowing what I know now? Absolutely. And will I be using it for many Halloweens (and Christmases, and movie nights) to come? You can count on it.
This Halloween, I went from boring decorations to being “that house” with the incredible display. And honestly? That feeling of seeing kids’ faces light up with genuine excitement and wonder made every bit of research, every dollar spent, and every minute of setup completely worth it.
If you’re on the fence about getting a Halloween projector, my advice is simple: do it. Start with a quality mid-range option like what I chose, invest in at least one good animation, and prepare for your Halloween game to be forever changed.
Trust me on this one. Your future self (and your neighborhood trick-or-treaters) will thank you.